Before & After Guest Blogger: Blueprint Bliss!


Hi everyone! It's Brooke from Blueprint Bliss. A special thanks to Lauren for asking me to guest post on Pure Style Home.


I wanted to show you a recent DIY project that I did for my home office. My home office has been under transformation for awhile- but it's still not quite there (lots of junk to organize and put away).


I am on a pretty strict budget for projects around our house- but I was needing a new desk chair along with a chair for my sewing table (both in the same room). I found two chairs at a local antique store that is going out of business (for those of you in Birmingham- Crestwood Antiques).
Here is one of the chairs before (one has arms and one does not):
*please excuse the mess in the background*
Here is a photo of the two (along with another random chair from my local Good Will) getting ready to be transformed:
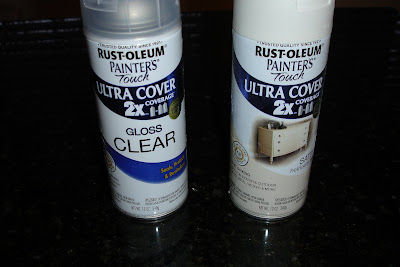
I used these two products from Home Depot:
- Satin spray paint in Heirloom white
- with a finishing coat of clear gloss
And here is one of the transformed chairs:
 

I used a fabric that I found at King Cotton (here in Birmingham). I needed just 1/2 yard to complete the project (both chairs). I popped the cushions out of the frame, centered my pattern, and just used a staple gun to attach.
I'm very pleased with the outcome. Two new chairs for my home office on a budget.
Here is a break down of what I spent:
2 chairs ($12.50 each)= $25
spray paint & gloss sealer= $20
fabric (1/2 yard)= $10
total for both chairs:
= $55 (only $27.50 each)
This is just a reminder that it doesn't take a lot of money to come up with that perfect something that you are needing for your home!
---------------------------------------------------------------------------

Thank you so much to Brooke for this awesome chair makeover!!  The chairs went from eeeeeek  to gorgeous!!  I love the fabric & they must be such pretty fun additions to the room!  (And how perfect is the price??)

Have a great day everyone-  we're still snowed in --yay!!

xoxo,
lauren

Check out 5th & State for your chance at a design plan for the makeover of the front of your house!!

Pure Organization Project #5: (You Knew It Was Coming): The Junk Drawer

So it's another not-so-pretty project, but one that makes life easier.  The truth is, my junk drawer got to the point where it wouldn't shut anymore, so it was really obvious as to which organizational project we'd be undertaking this week.  It was so bad:


So many things that belonged in other places had found their way in.  (above)  I did this junk drawer clean-up in 2 stages.  (In the first one, above, I got rid of all of the things that didn't belong and got plastic ziploc bags to corral all of the different little things like screws, extra wine stops, pingpong balls, etc.  It took 10 minutes or so.)  Something else must have demanded my attention because I stopped there.  I picked up the project a couple of days later when it was here:


There were still some things that needed to go elsewhere so I ditched them and added a drawer organizer & had fun putting all of the little things in their spots:  (so organizationally-nerdy, I know!)  And here it is now:


Yes, she's a beauty!  hahaa  but I'm seriously really proud of it.  My sister-in-law was visiting the other day & asked me where a pen was and I was SO happy she'd asked.  "It's in the junk drawer," I said and directed her to it.  "THIS is your junk drawer???"  She asked.  And it thrilled me to the bone.  "YES!!  It is!!"  (And then I went on to tell her that it was a new & improved junk drawer.) 

I've had this drawer organizer (below) for years & don't remember where I got it but I came accross it a few days ago in the basement.  Perfect!  I love that the top slides to reveal space below.  You have to be careful with these though...  If you don't keep them organized & they get to full, they can become really cranky & keep the drawer from closing.  (I speak from experience...  I think it's why the thing ended up in the basement.)


See our cooking stone above?  And I saw a pretty green gift bag lying around so I sliced it open & lined the bottom of the drawer with it.  I grabbed some seldom-used bowls & used them to corral matches & name holder wine corks.  Now we've got a good spot for our his & hers screwdrivers:


My plan of attack was to basically get all of the tiny things & put them in other containers like the bags of misc screws. nails, etc.  It really helped because for us it was the little things that were everywhere that drove me insane:


... And the broken pieces of chalk went into this little jar:


I specifically left extra space in the junk drawer so it can do its job as a catch-all for random things of the kitchen, but I do know it'll need need tending to in a few months or so.  But I have to say, I enjoyed the project so much more because of the green gift bag lining the drawer.  As silly as it sounds, I know I'll keep it neater in there just because it's prettier.  Can't wait to see your projects!!

xoxo,
lauren

I'm attempting to use Mr.Linky so if you participate in this week's junk drawer project, you can link to your blog post here!  Just type in your name and the address of the exact post so we can all visit.  (I know there must be a better way to explain that but I really don't know it.) 


*Also check out this giveaway giving you the chance to have design help for the front of your home!!